Wednesday 21 November 2018

Dragonflies

Another journaling prompt. I'm sure you can guess what it was by the post title. Its a very simple page. I used blue, (tumbled glass) violet( shaded lilac) and green( Cracked Pistachio) Distress Oxides for the background and  yellow( scattered straw)  and orange ( spiced marmalade) to go under the lamp. I used an old script stamp and crackled effect stamps to add texture to the page. I printed and cut out the lamp and dragon flies  from Kisspng and adhered them to the page with Mod Podge I printed out the quote and added some shadow with a grey Pitt pen. and the page was complete. 

I thought the lamp would be a great change from the usual flowers with dragon flies flying around them. Saying that I think I should have put the lamp on a table top instead of having it floating in the air!!

Friday 16 November 2018

Even more Christmas cards!

 I've lost count how many cards I've made but here are a few more!
This one is a double circle welded to form a round card. This was cut out of red glitter card. I the cut out the decoration and bow from gold mirri card and adhered them tot he circle. Its finished off with a red gem. A quick and easy card.

Another quick and easy card. I cut out a row of ginger bread men a strip of glitter card and some Christmas paper from my stash. I matted the paper at the bottom of the card placed the strip of glitter card above it then the gingerbread men. I coloured their buttons and bows with markers and used a peel off for the sentiment.
The blue and silver card was created by using my GoPress and Foil machine and an Anna Griffin snowflake hot foil stamp. The card was mounted onto some silver glitter card and matted onto the blue base card. The card was finished with some clear gems.

The red card is a shaker card. I cut out the decorative baubles from gold mirri card. I also cut the outline of the baubles from the red card to form an aperture. I placed some clear acrylic sheets behind the bauble aperture and placed the gold detailed bauble on top.  I added some gold peel offs to form the ribbon and edge of the cards. I lined the back of the aperture with foam tape to create a seal for the beads. I also edged the red card with foam tape to the card would stand away from the base.   I placed some gold beads where  the centre of the apertures would be and paced the red card on top sealing the beads within the foam around the aperture. I had a ready made sentiment and adhered that to the card.

Wednesday 14 November 2018

Stars

Another Artful Evidence challenge. This time the prompt is "Stars". I used acrylic paint to do the navy blue background and white Posca pens for the dots and stars. I also added some silver star confetti . I coloured the stars using yellow Pitt pens and left the silver confetti their natural colour. I coloured the bottom half of the page with off white/blue paint and used a swirl stencil ( home made) to add some molding paste on top of the white "cloud". I cut out the girl and adhered her tot he page and edged her in black pen. I printed out the quote and glued that to the page, edged it in yellow pen. I finished the page by coating the molding paste swirls with Wink of Stella glitter pen  to give some sparkle.

Monday 12 November 2018

More Christmas cards

Here are some more Christmas cards I've been making recently. I have used dies by Sue Wilson, these are her triptych arch and frame and her angel dies. I confess that I have more or less copied her idea from one of her videos although I did use different cards and flowers.

The other cards were copied from a Pinterest page.
The top left card was created by cutting the Arch in white card and the underneath layer in white glitter card. I layered the two and adhered them to white linen card. this was then matted onto grey then red and adhered to the white base card. I already had some small silk flowers and leaves in my stash and used them to adhere tot he bottom of the window. I cut out the wording using my trusty Cameo and glued them to the card to finish it off.
The top right hand card window was made in the same way as the previous card except I created the under layer using Brushos paint crystals that were spritzed to give the mottled effect.  I cut out the angel in black card and the outline in white card and layered them . I adhered her tot he card that had been matted with black card onto the case card. I added some dark blue silk flowers in the bottom corner. As with the other card I cut out the wording and added it to finish the card.

The bottom card again used Sue Wilson dies I cut out the angel and frame from black card. I used the frame as a template to trace the shapes onto the base card. I coloured the shapes using Kuretake water colour brush pens. When dry I placed the black frame over the shapes to give a stain glass window effect. I inserted white glitter card into the centre of the frame and added the angel. I think this one is my favourite so far!

Sunday 4 November 2018

Diamonds

As you can see I'm really getting back into mixed media journalling. This week's challenge is "Diamonds".
The background was created using cream acrylic paint, Brusho Paint crystals, a diamond stencil, rub-ons and Stampin Up blue ink.

I used cream acrylic paint as a base colour. I sprinkled a variety of the Brusho  crystals over the left hand side of the page and spritzed with water. When it was dry I used a stencil, which was a piece of plastic from home, and daubed the blue ink over it to create the diamond pattern on the top right and bottom left of the page.

I used a stamp to give a cracked effect and finished the background with a few bits of rub-on from my stash.

I cut out the butterflies from white card and purple Mirri card  and adhered them to the page using matt medium.

I love the effect that Brushos make. It is a very versatile medium. Thats it for this challenge.


Christmas cards ( Free cutting file.)

It's that time of year again when crafters are busy making  Christmas cards to send to friends and family. I like to vary the design  of the cards so I don't get bored of making them. I tend to make up to 4 of each design, at most, I mainly only make about two though.


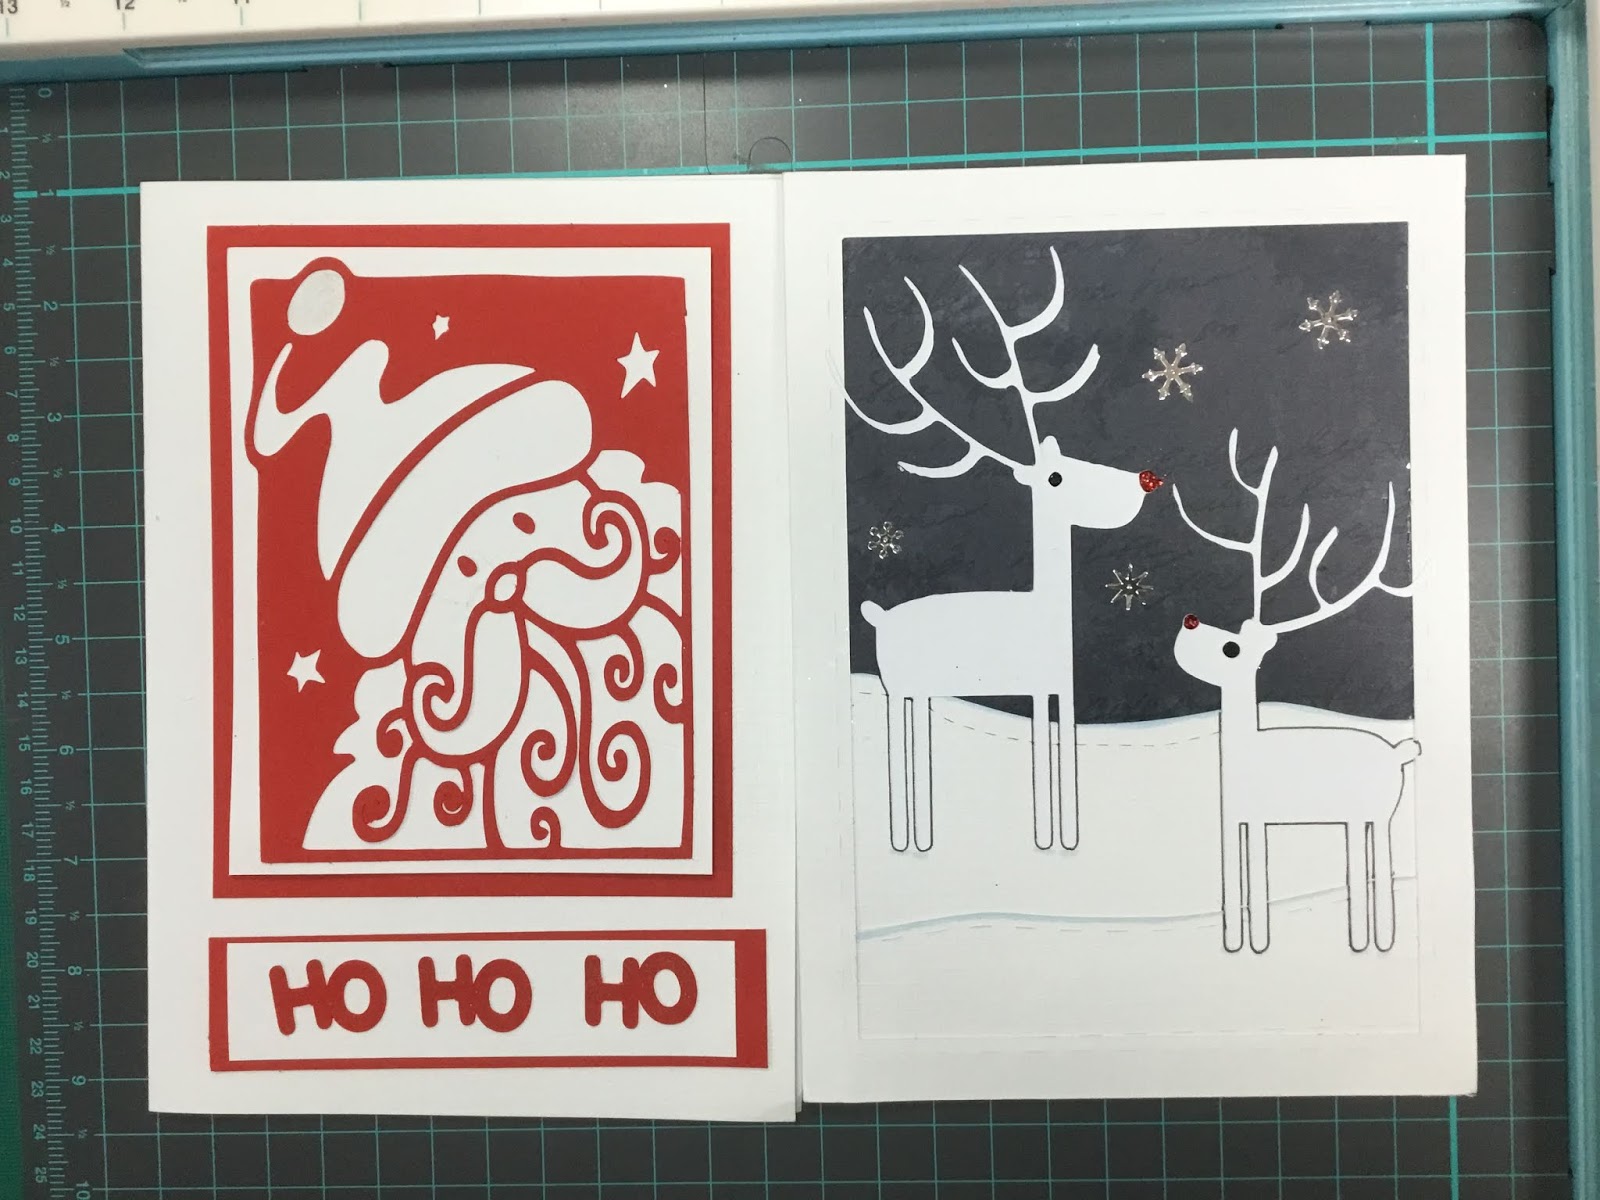
I got the idea, for the two cards on the left,  from Pinterest. I  a some reindeer clipart and created the card  on my Cameo and adhered them to black card. You can download the file HERE.

The Santa square is a file I downloaded last year from the Silhouette design store (design ID 14733). I layered the card on white and red card and added the HO HO HO.


The snowmen cards are my design. I cut out a circle from the centre of some red card. I a white gel pen to add dashed lines around the edge of the card and circle to add some interest. Next I used my Hero Arts snowmen stamps to stamp, colour and cut out the snow men and hats. They were adhered to the back of the red card. I then adhered the red card to the base using foam pads. I had some clear gems and snowflake stickers that I stuck to the card as well  The lettering was made using my Cameo. I don't know what I would do if I didn't have my Cameo its so useful.

The dark blue card was me experimenting with a Christmas tree die and my GoPress and Foil foiling machine. I laid the die on the machine, layered foil on top and heated it up so the foil adhered to the card. I added some gems and a glitter star. The topper was matted onto silver Mirri card and back onto the navy base card.

The white card was done using a Chloe tree stamp. I stamped with Versamark and heat embossed it with silver embossing powder. I cut the shape into triangle and matted onto silver Mirri card and then onto the white base card.


I do like the variety of methods used because I find it challenging when I try something for the first time.


I've got a few more cards to make so keep watching.....

Wednesday 31 October 2018

Halloween. ( Cutting file)

Yet another Artful Evidence challenge, this time a topical one as its Halloween week.
It didn't turn out anything like I intended but I liked the way it developed as I went along. Originally I was going to do a witch's cauldron with poison and weird  "ingredients" around it.
I used purple Dylusions spray ink to cover the page. I then used orange and yellow to colour a separate paper that I ripped into a rough square shape. However, once I'd adhered it to the page I thought the layout looked too much like the  Autumn theme page.

As the top layer was orange I decided to turn it into a pumpkin instead so drew and shaded some lines using brown Pitt pens.  In order to disguise the squarish shape of the pumpkin I printed and cut out some pumpkin leaves and adhered them around the page.

I soon realised I didn't have enough room in the centre of the page to add a cauldron and other elements so I had to put my thinking cap back on. I decided to make the pumpkin a bit spooky so drew in the eyes using Pitt pens.

I cut out the rook and adhered it to the page so it would be looking at the eyes. I added some white pen to highlight the bird.
I added some shadows, cobwebs and wrote the lettering.
I'm quite pleased with it even though it is totally different to my original idea. That's the beauty of a  page evolving as you go along.

If you would like the rook cutting file you can download it HERE

Sunday 28 October 2018

Steampunk


I was delighted to have won the Autnumn challenge and had my page used as the groups  cover page for that week. 
This is my offering for the artful evidence challenge. It's not your typical steampunk but I like it.
I painted the background with acrylic paints and a dotted stencil by Tim Holtz. I stamped some images on the background using Stazon and Dyan Reavely and Chronology stamps. I mixed yellow paint with some texture paste and spread the paste on the bottom of the page. It gives the page some texture. 
I used a Tim Holtz stencil to add some "bubbles" using white paint.
 Next I cut the border and cogs   from grey cardstock  I adhered these onto the page with some matte medium. I added some split pins then printed out and cut the other elements and glued them to the page using.

Finally I doodled over parts of the page with metallic and coloured Pitt pens.
I've started making Christmas cards so I'll be posting photos of them shortly!